Christian Stoll 2021
Audio editing with Audacity
Basic functions
Audacity is a free audio software and can be downloaded for free from www.audacity.de for Windows, macOS and Linux. Audacity offers a large number of filters and effects and the ability to edit and mix audio files with any number of tracks. You can record audio files or open audio files for editing. 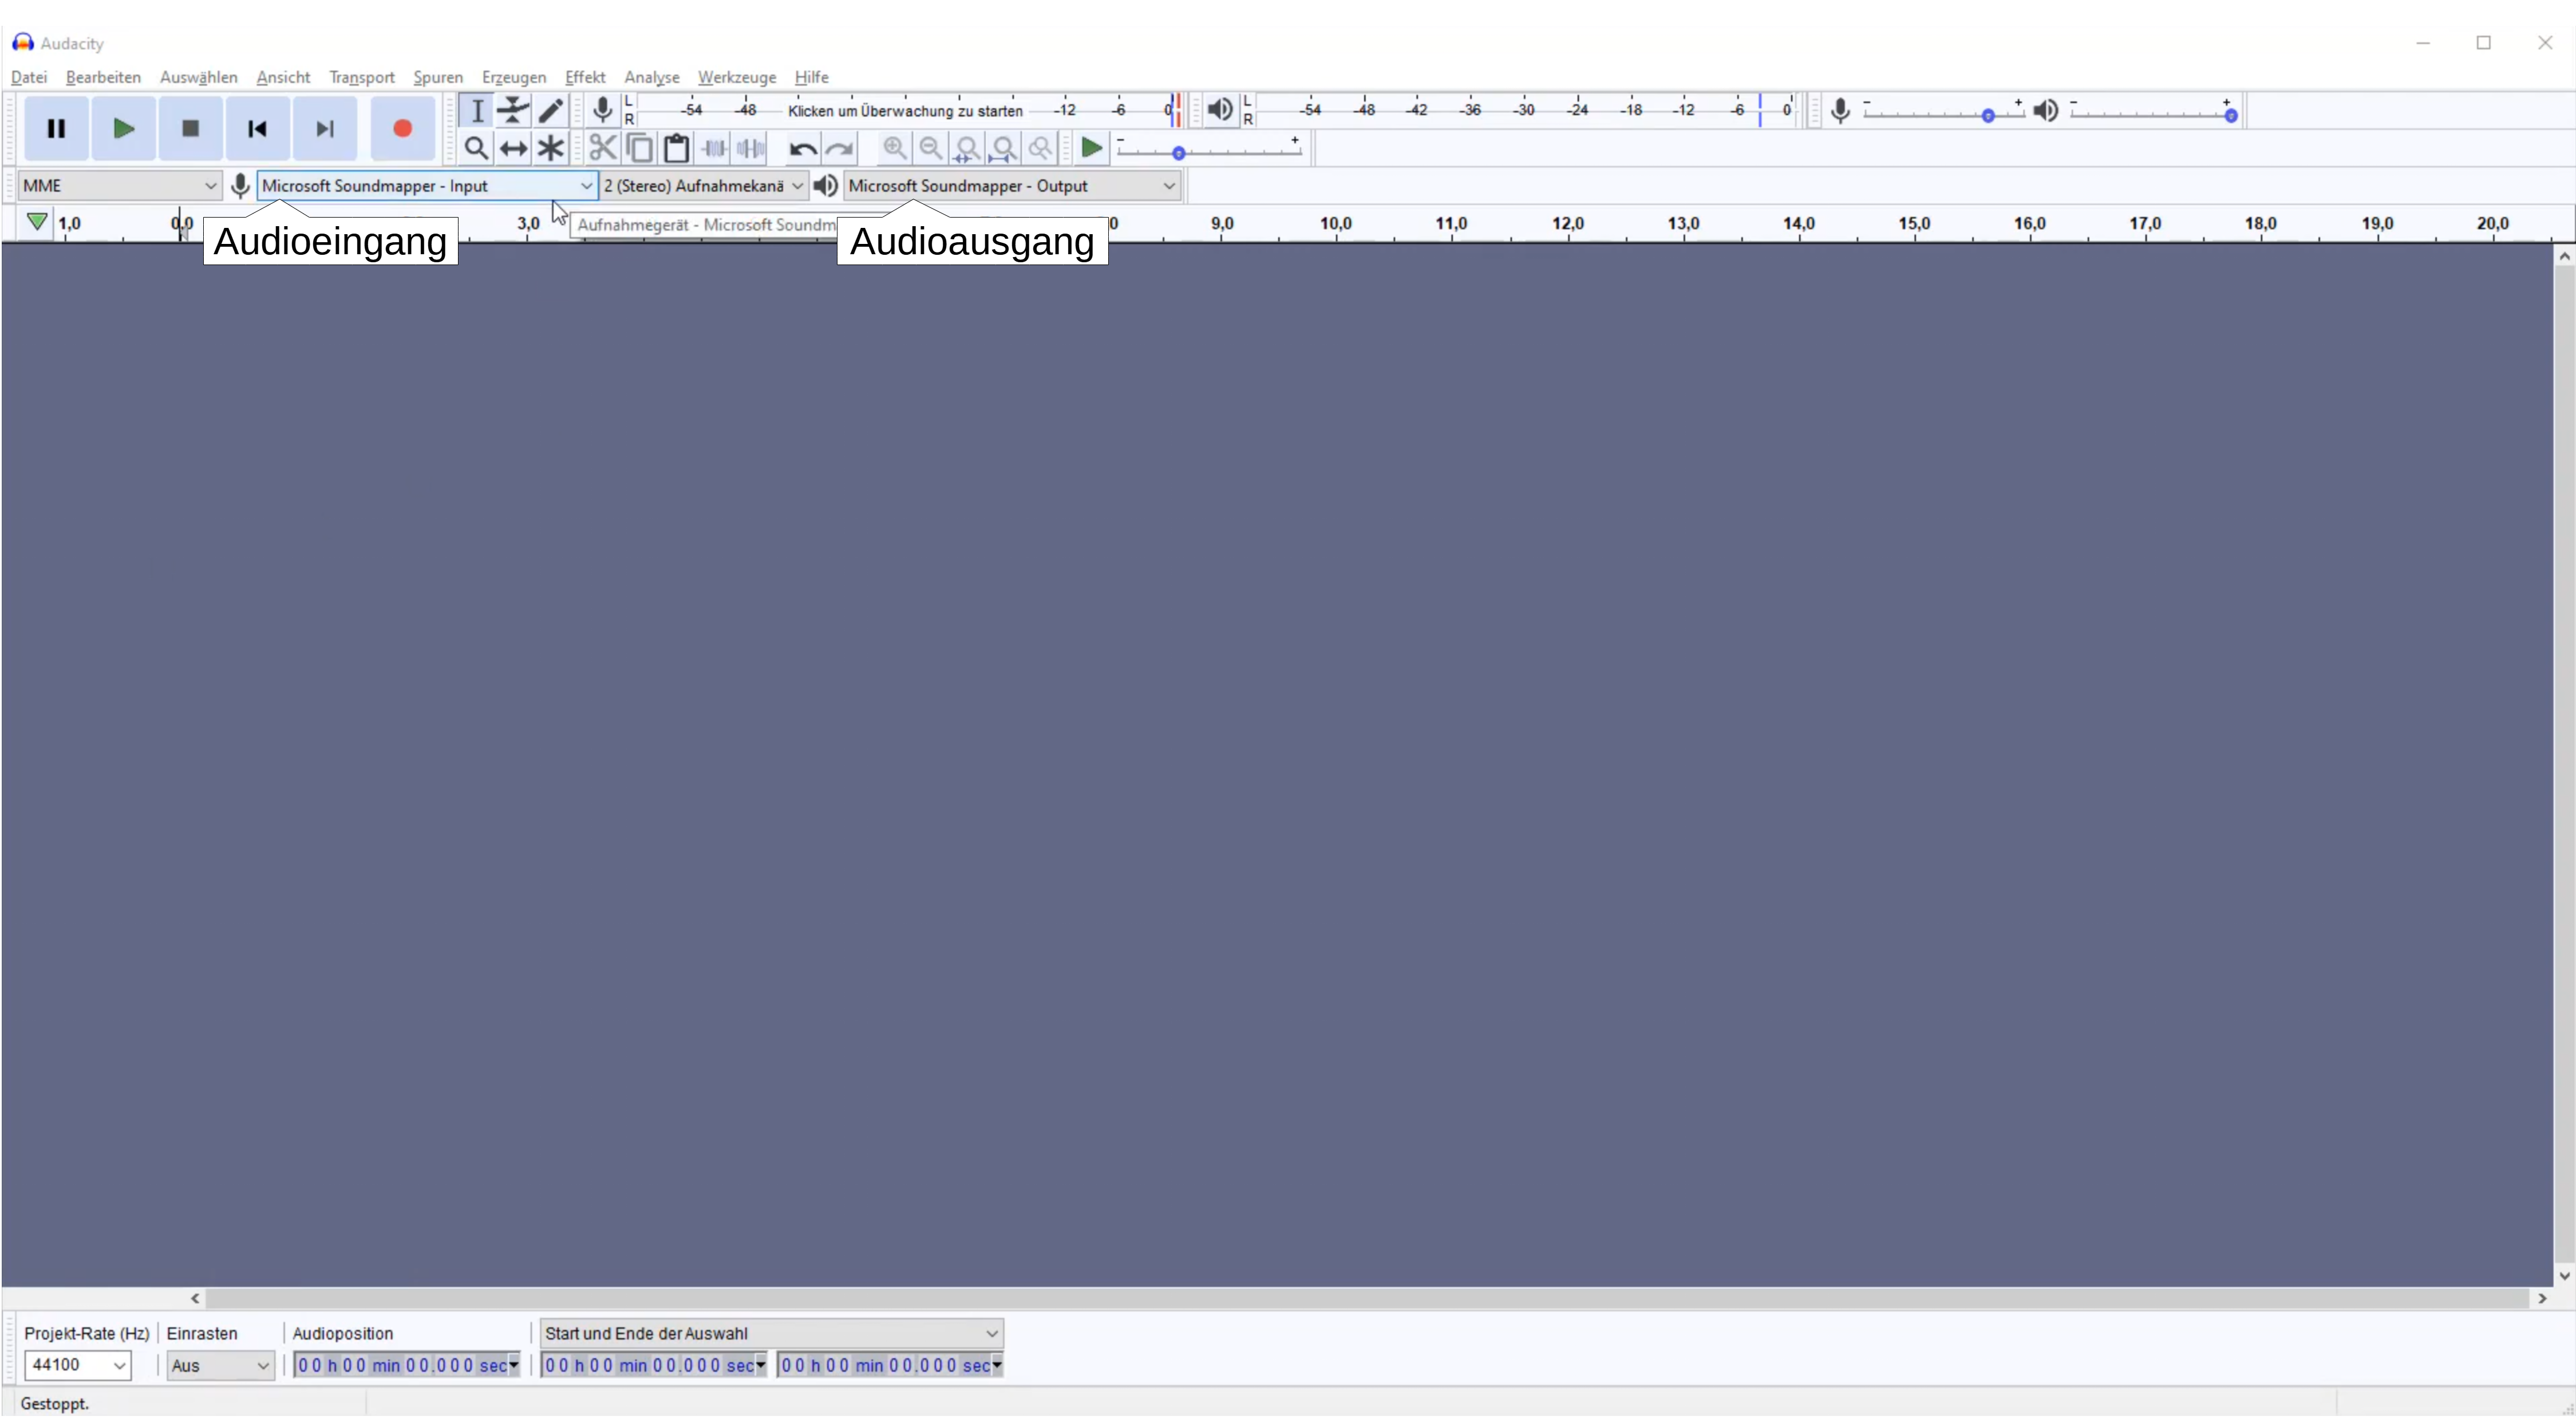
First of all, it should be checked whether the correct microphone and audio output have been selected.
Under „File“ / „Import“ I can select an audio file to be edited.
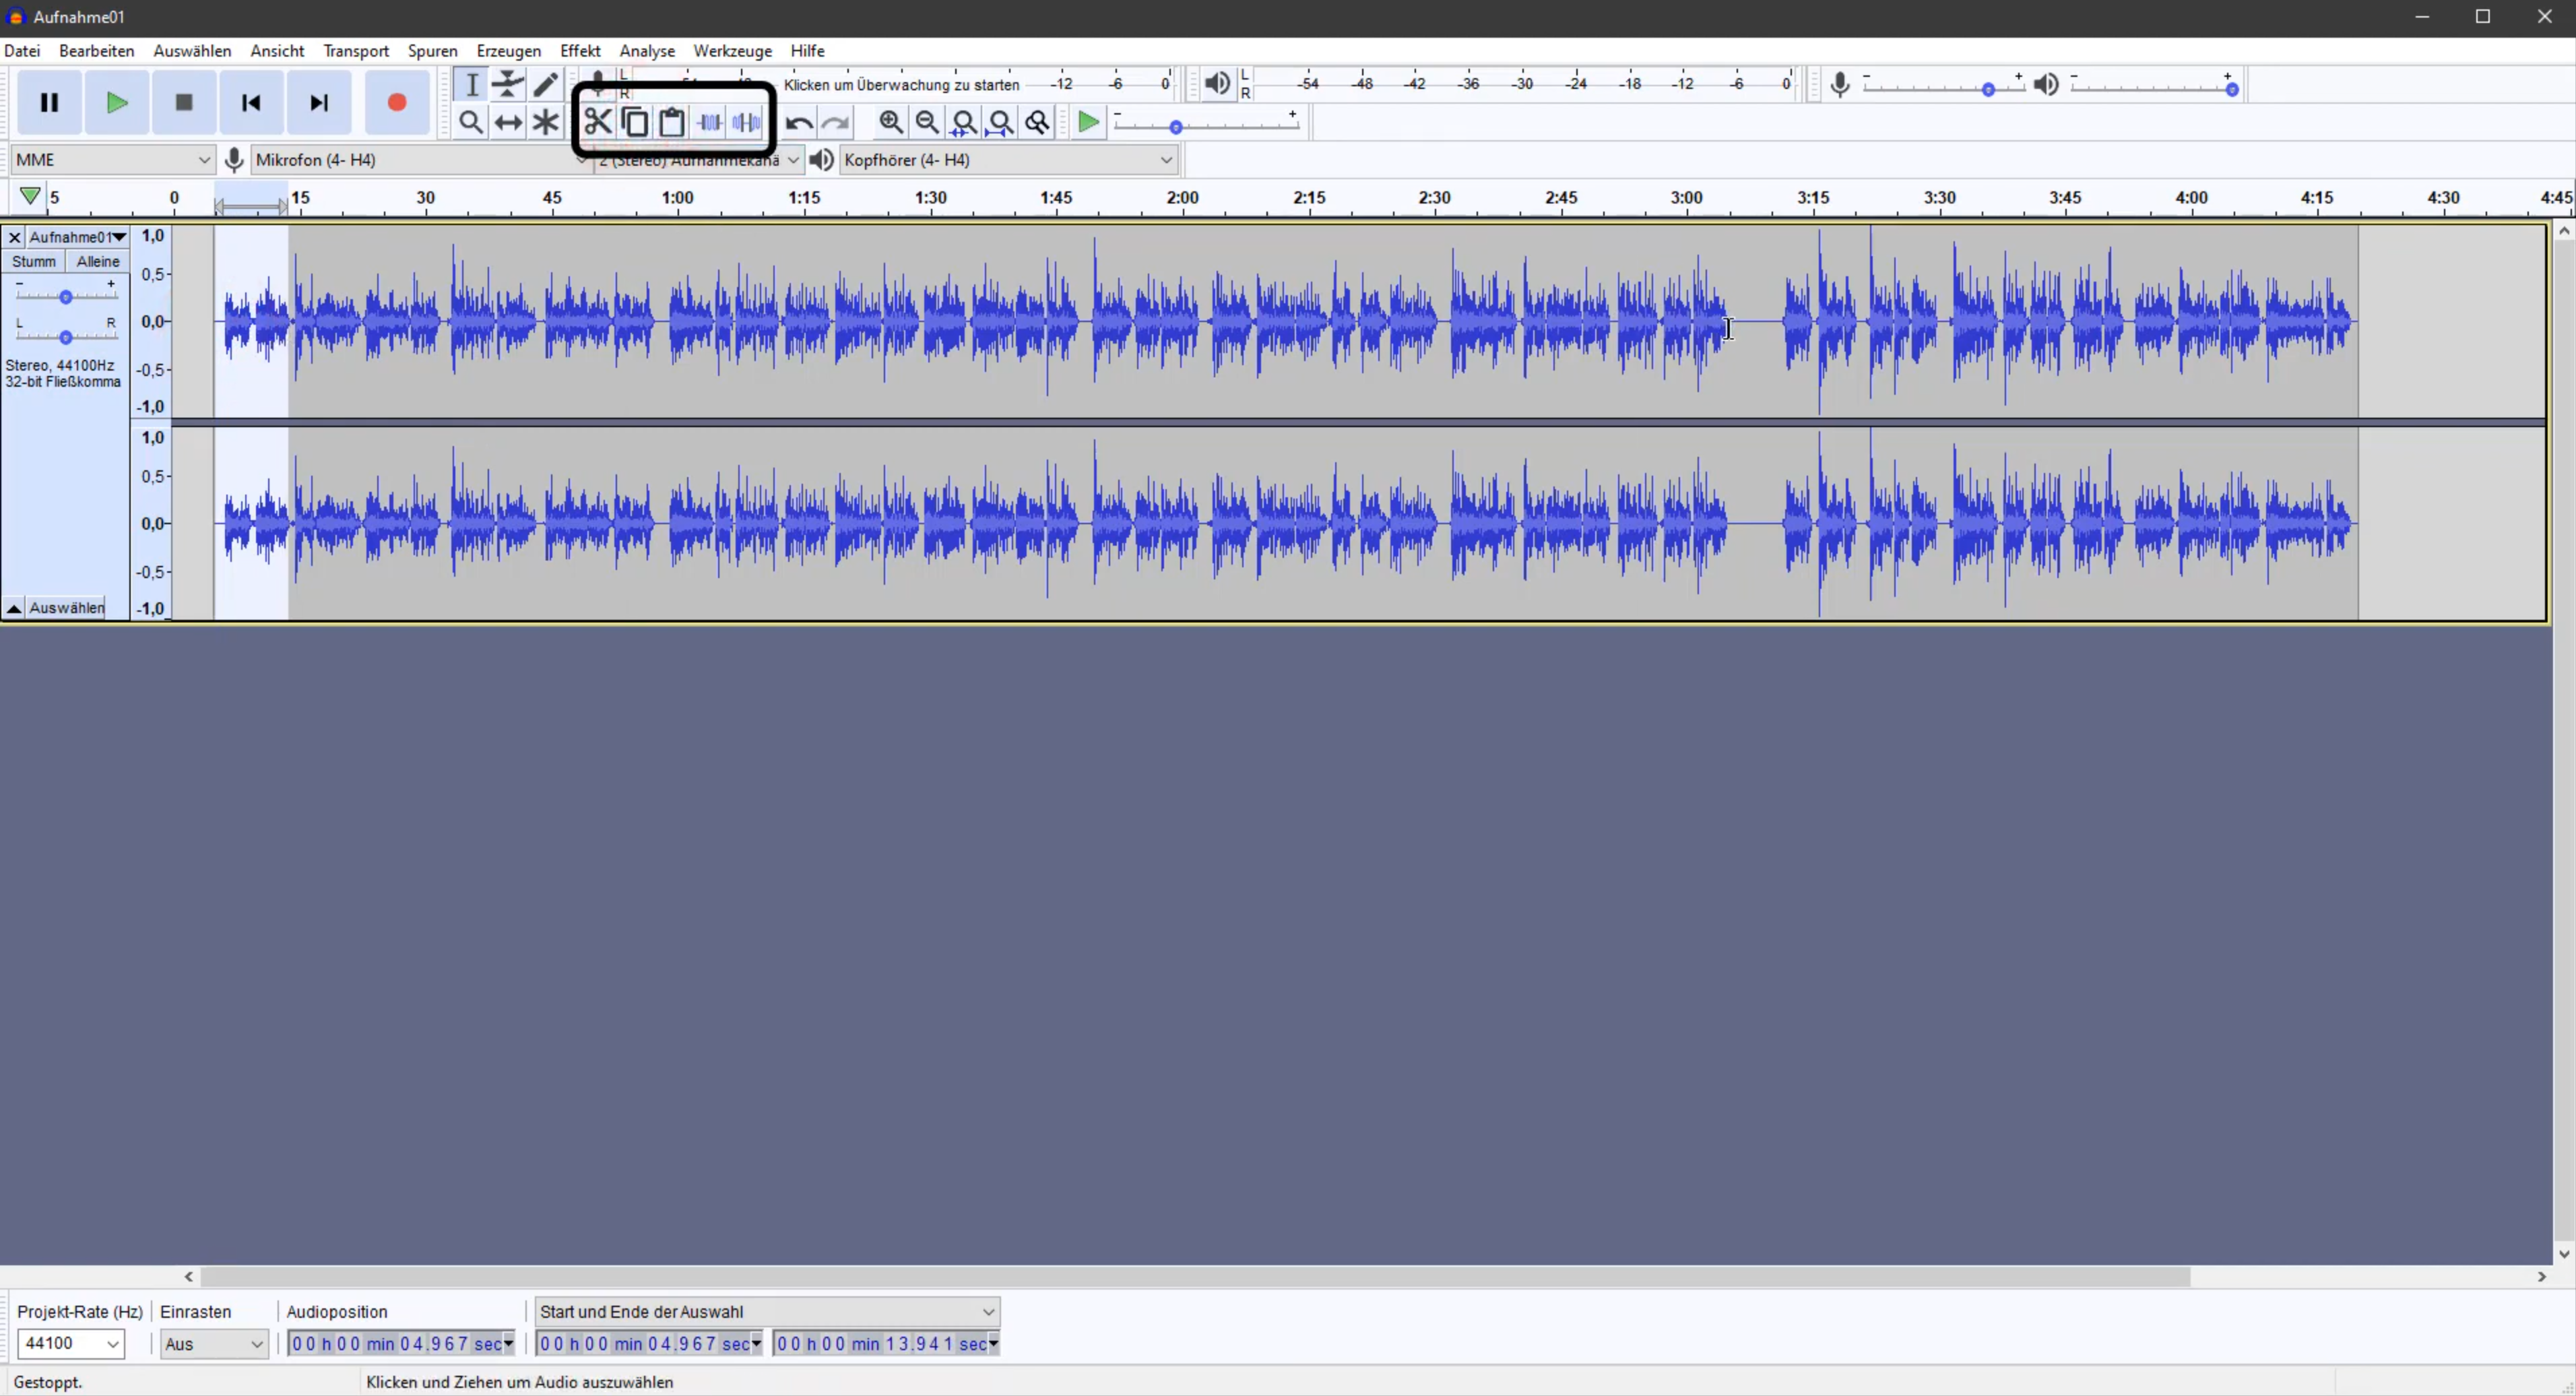
Audacity has the usual buttons for basic editing. Using these buttons it is possible to trim, cut, copy and paste parts of the audio file somewhere else. This is useful if, for example, I want to compile a truncated version from a radio feature or podcast episode.
To undo editing steps, go to „Edit“ and click „Undo“ or use the key combination ctrl+z.
t is also possible to work with multiple tracks (under „Tracks“ - „Add new“), for example to insert background music or background sounds. Each audio file that is imported appears in a new audio track. Audio material can be copied back and forth between the individual tracks.
When editing is complete, the audio file can be exported under „File“-„Export“.
Now a few editing steps will be presented that are particularly suitable for voice recordings.
Effects and filters
Filter curve
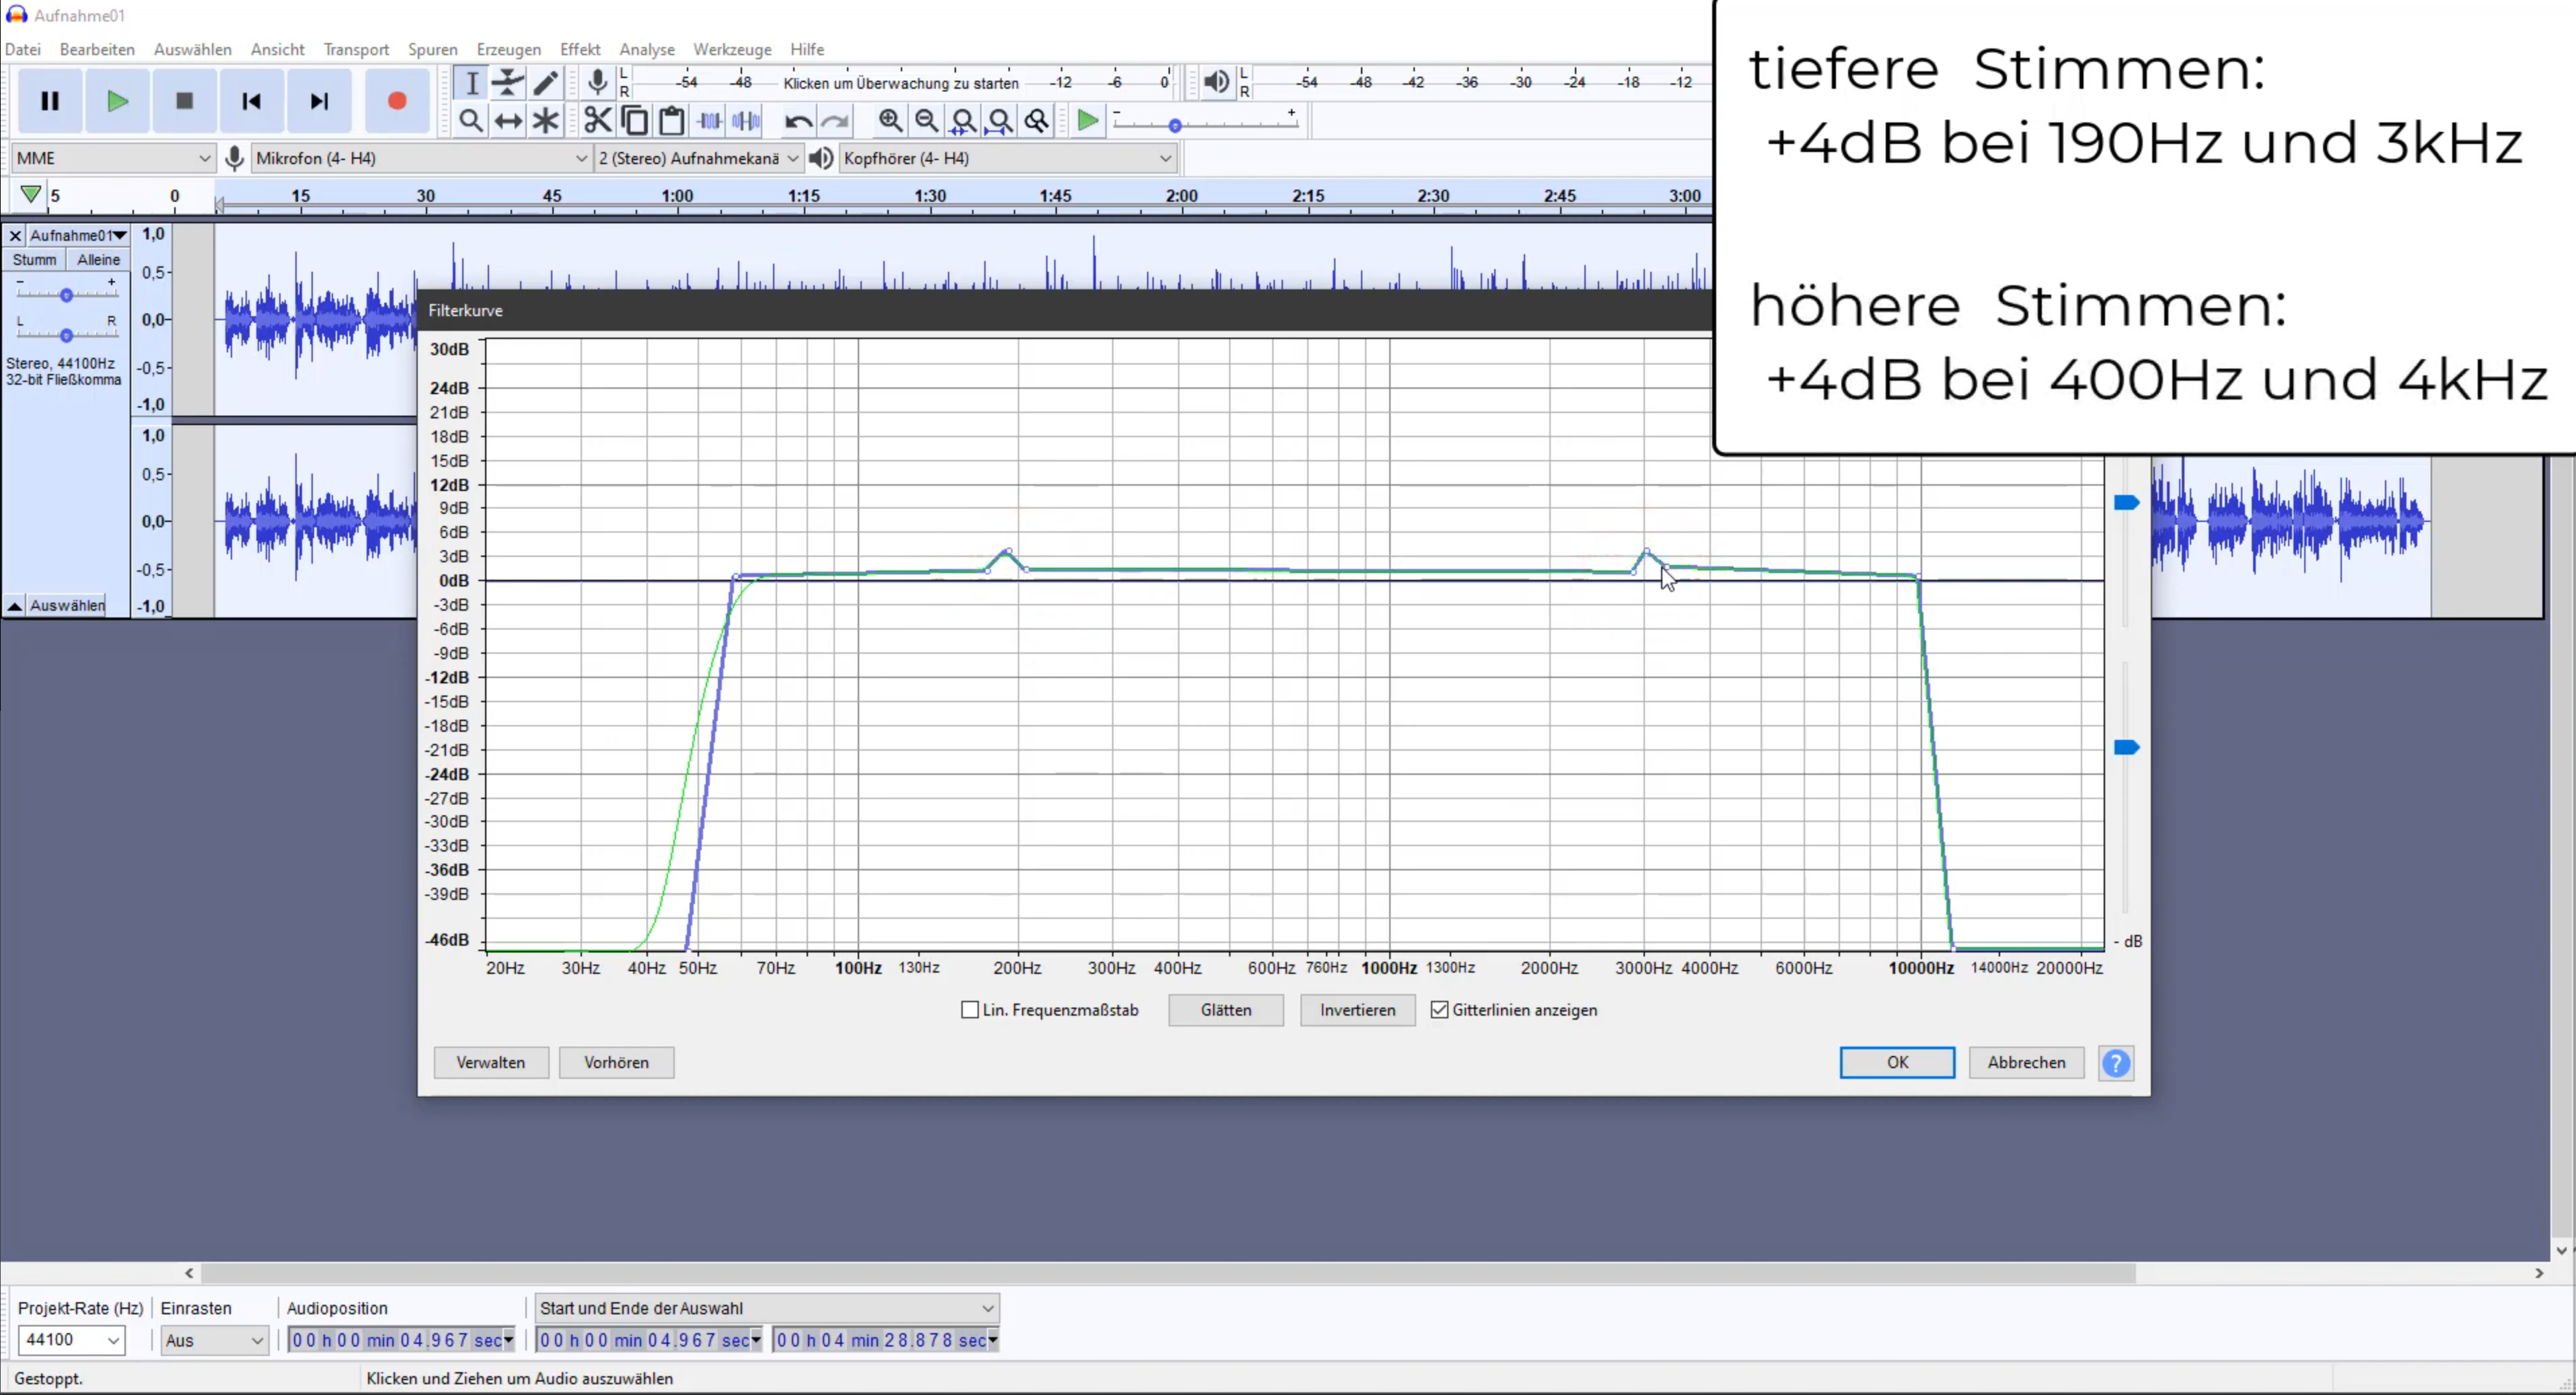 First, the filter curve. Select the entire recording and click Filter Curve under Effects. The X-axis shows us the frequency spectrum from 20 Hz to 20kHz in logarithmic representation. The Y-axis refers to the volume, i.e. depending on how we adjust the curve here, certain frequency ranges will become louder or softer. Clicking on the blue line creates small points with which I can manipulate the curve. First I take care of the low frequencies. We take out all frequency ranges below 60 Hz. This way you can filter out unwanted background noise like rumbling or footsteps. Then I take care of the very high frequencies. We filter out all frequencies that are above 10kHz. This way we suppress high frequency background noise and unpleasant Z, S and hiss sounds.
Now we can raise the frequency ranges of the voice a bit. For lower voices we recommend a +4dB boost around 190Hz and +4dB at 3kHz.
For higher voices, we recommend a +4dB boost around 400Hz and +4dB around 4kHz.
Limiter und Normalisieren
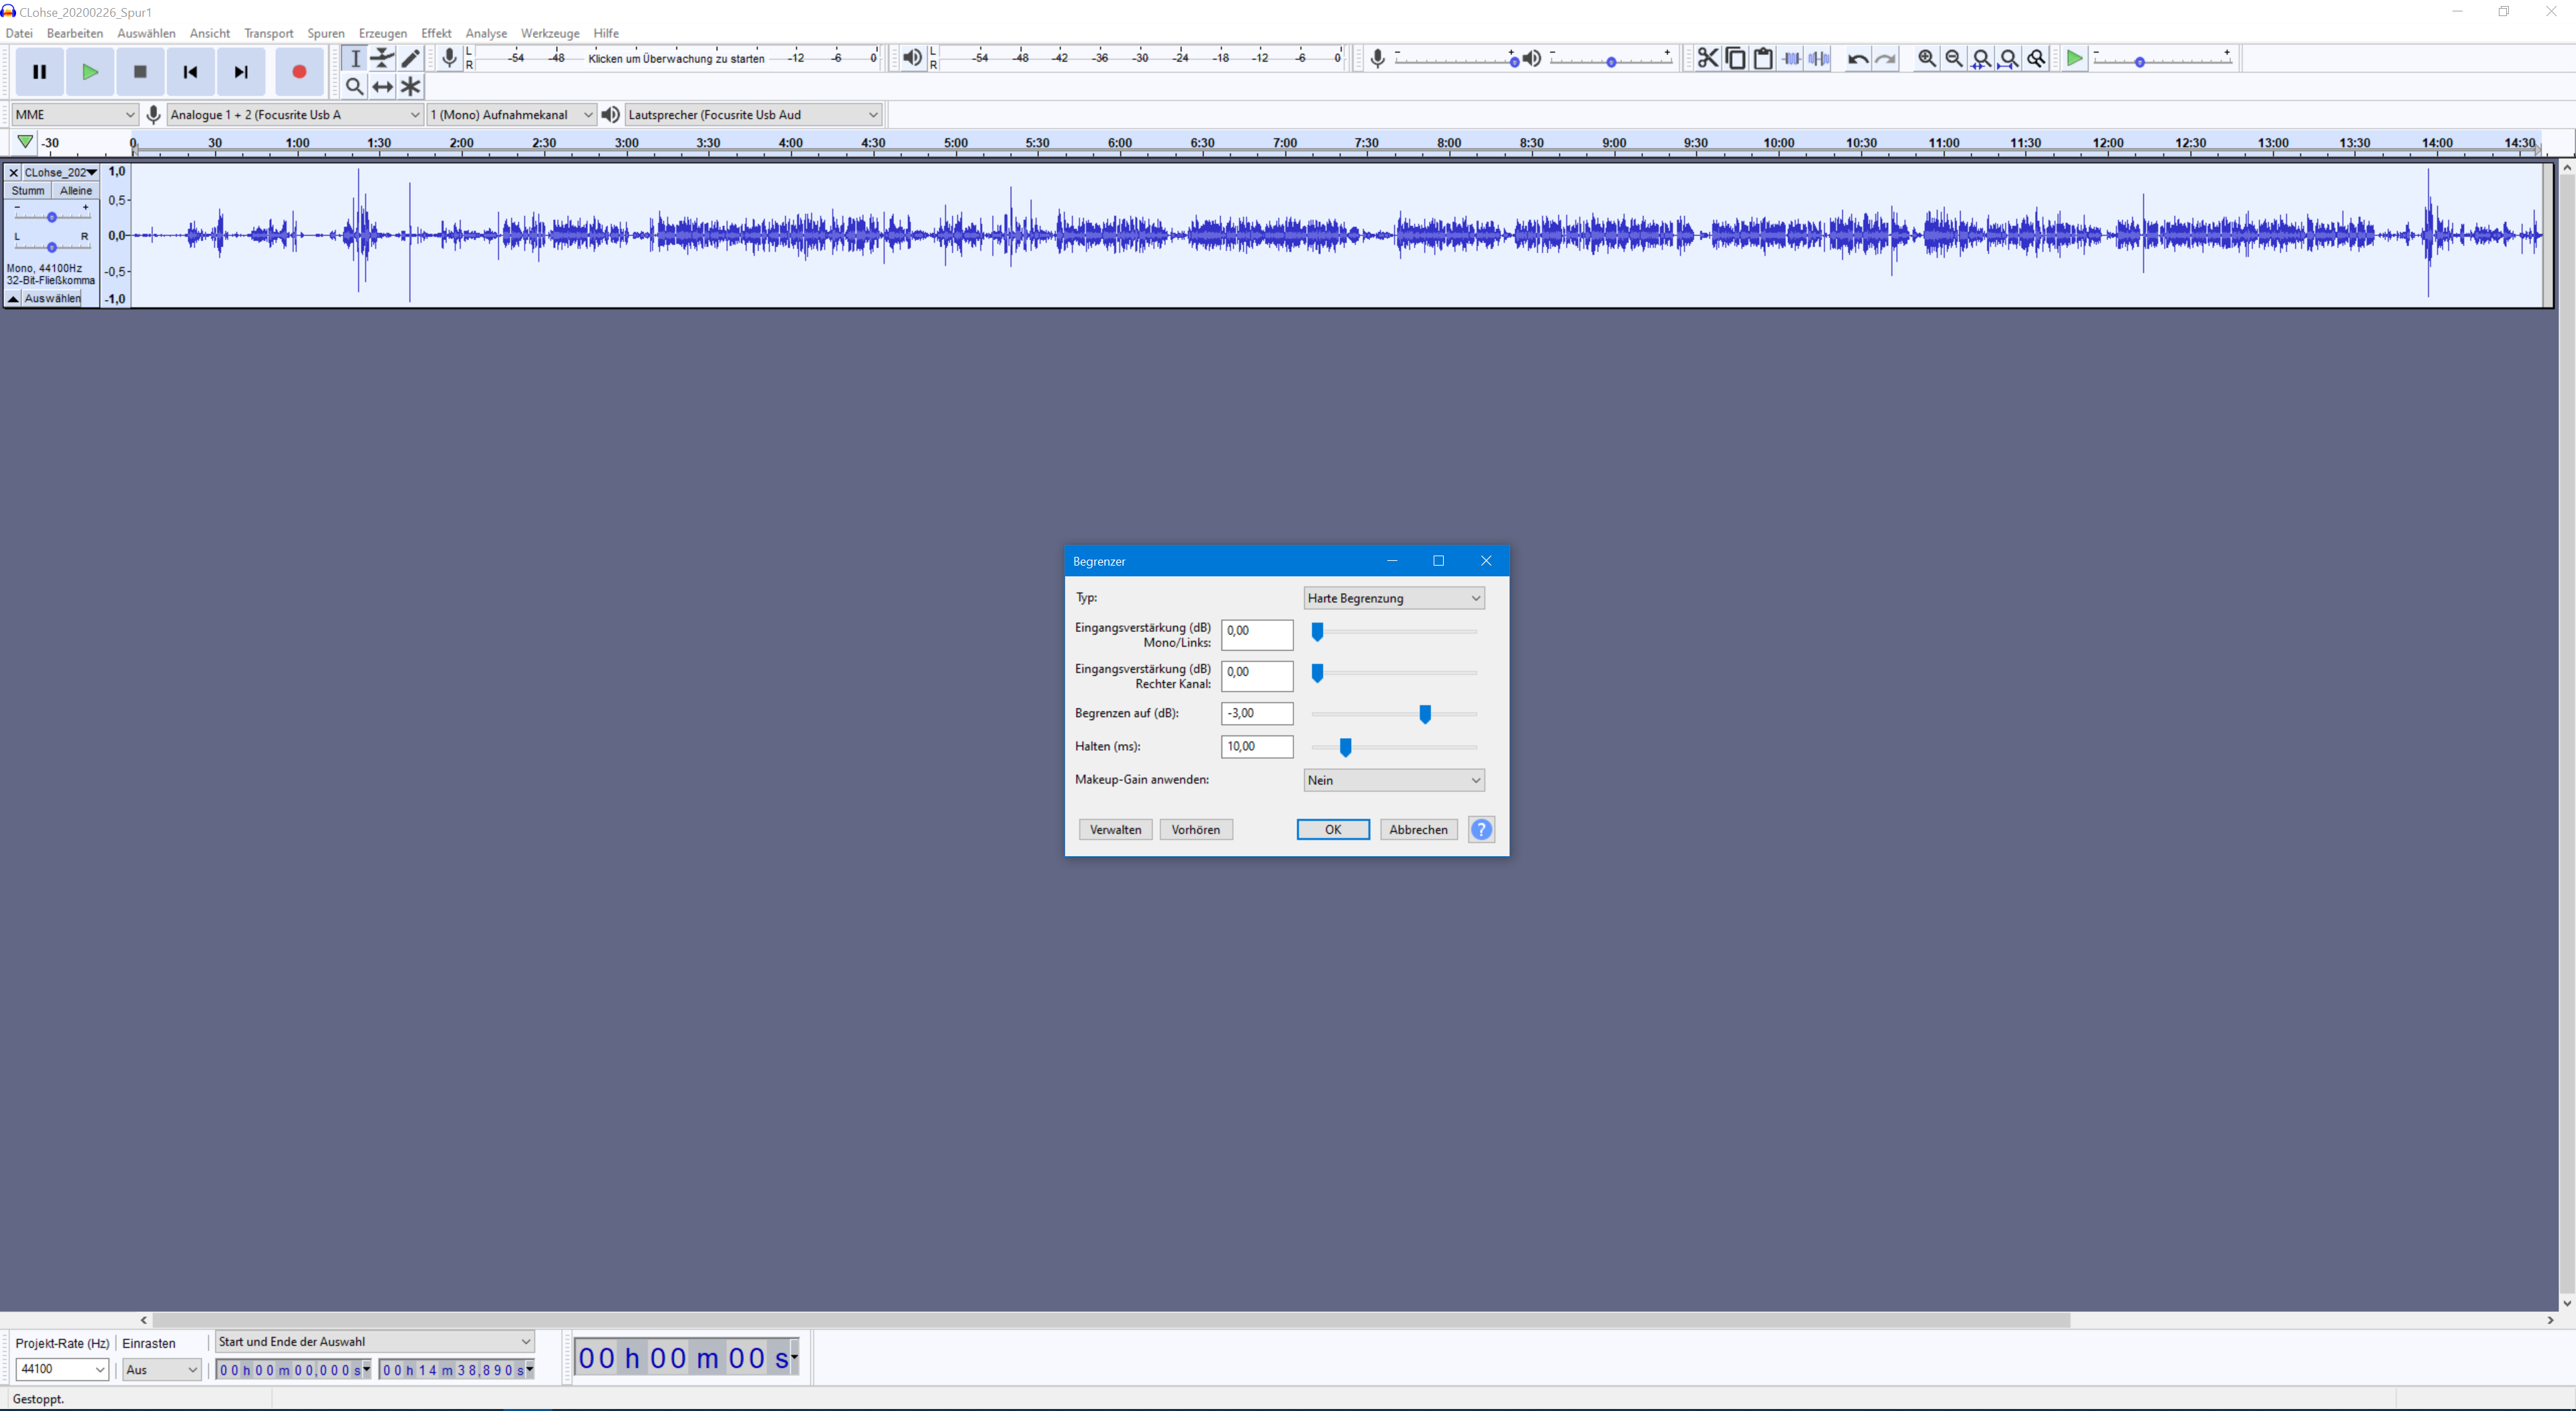 Now I want to normalize the amplitude, i.e. the volume. However, here in the recording I see single concise peaks, which I have to remove first to be able to normalize the audio file evenly.
A limiter is suitable for this. I can also find it under Effects. I set it to Hard Limit and -3dB, which means that all peaks louder than -3dB are cut away. Depending on the audio material you have to try a little bit until you find the right setting.
Now I can normalize the recording. To do this, I go to Effects and click on Normalize.
Noise reduction
EAnother useful function is the noise reduction. This is suitable for filtering out noise that could not be captured with the filter curve.
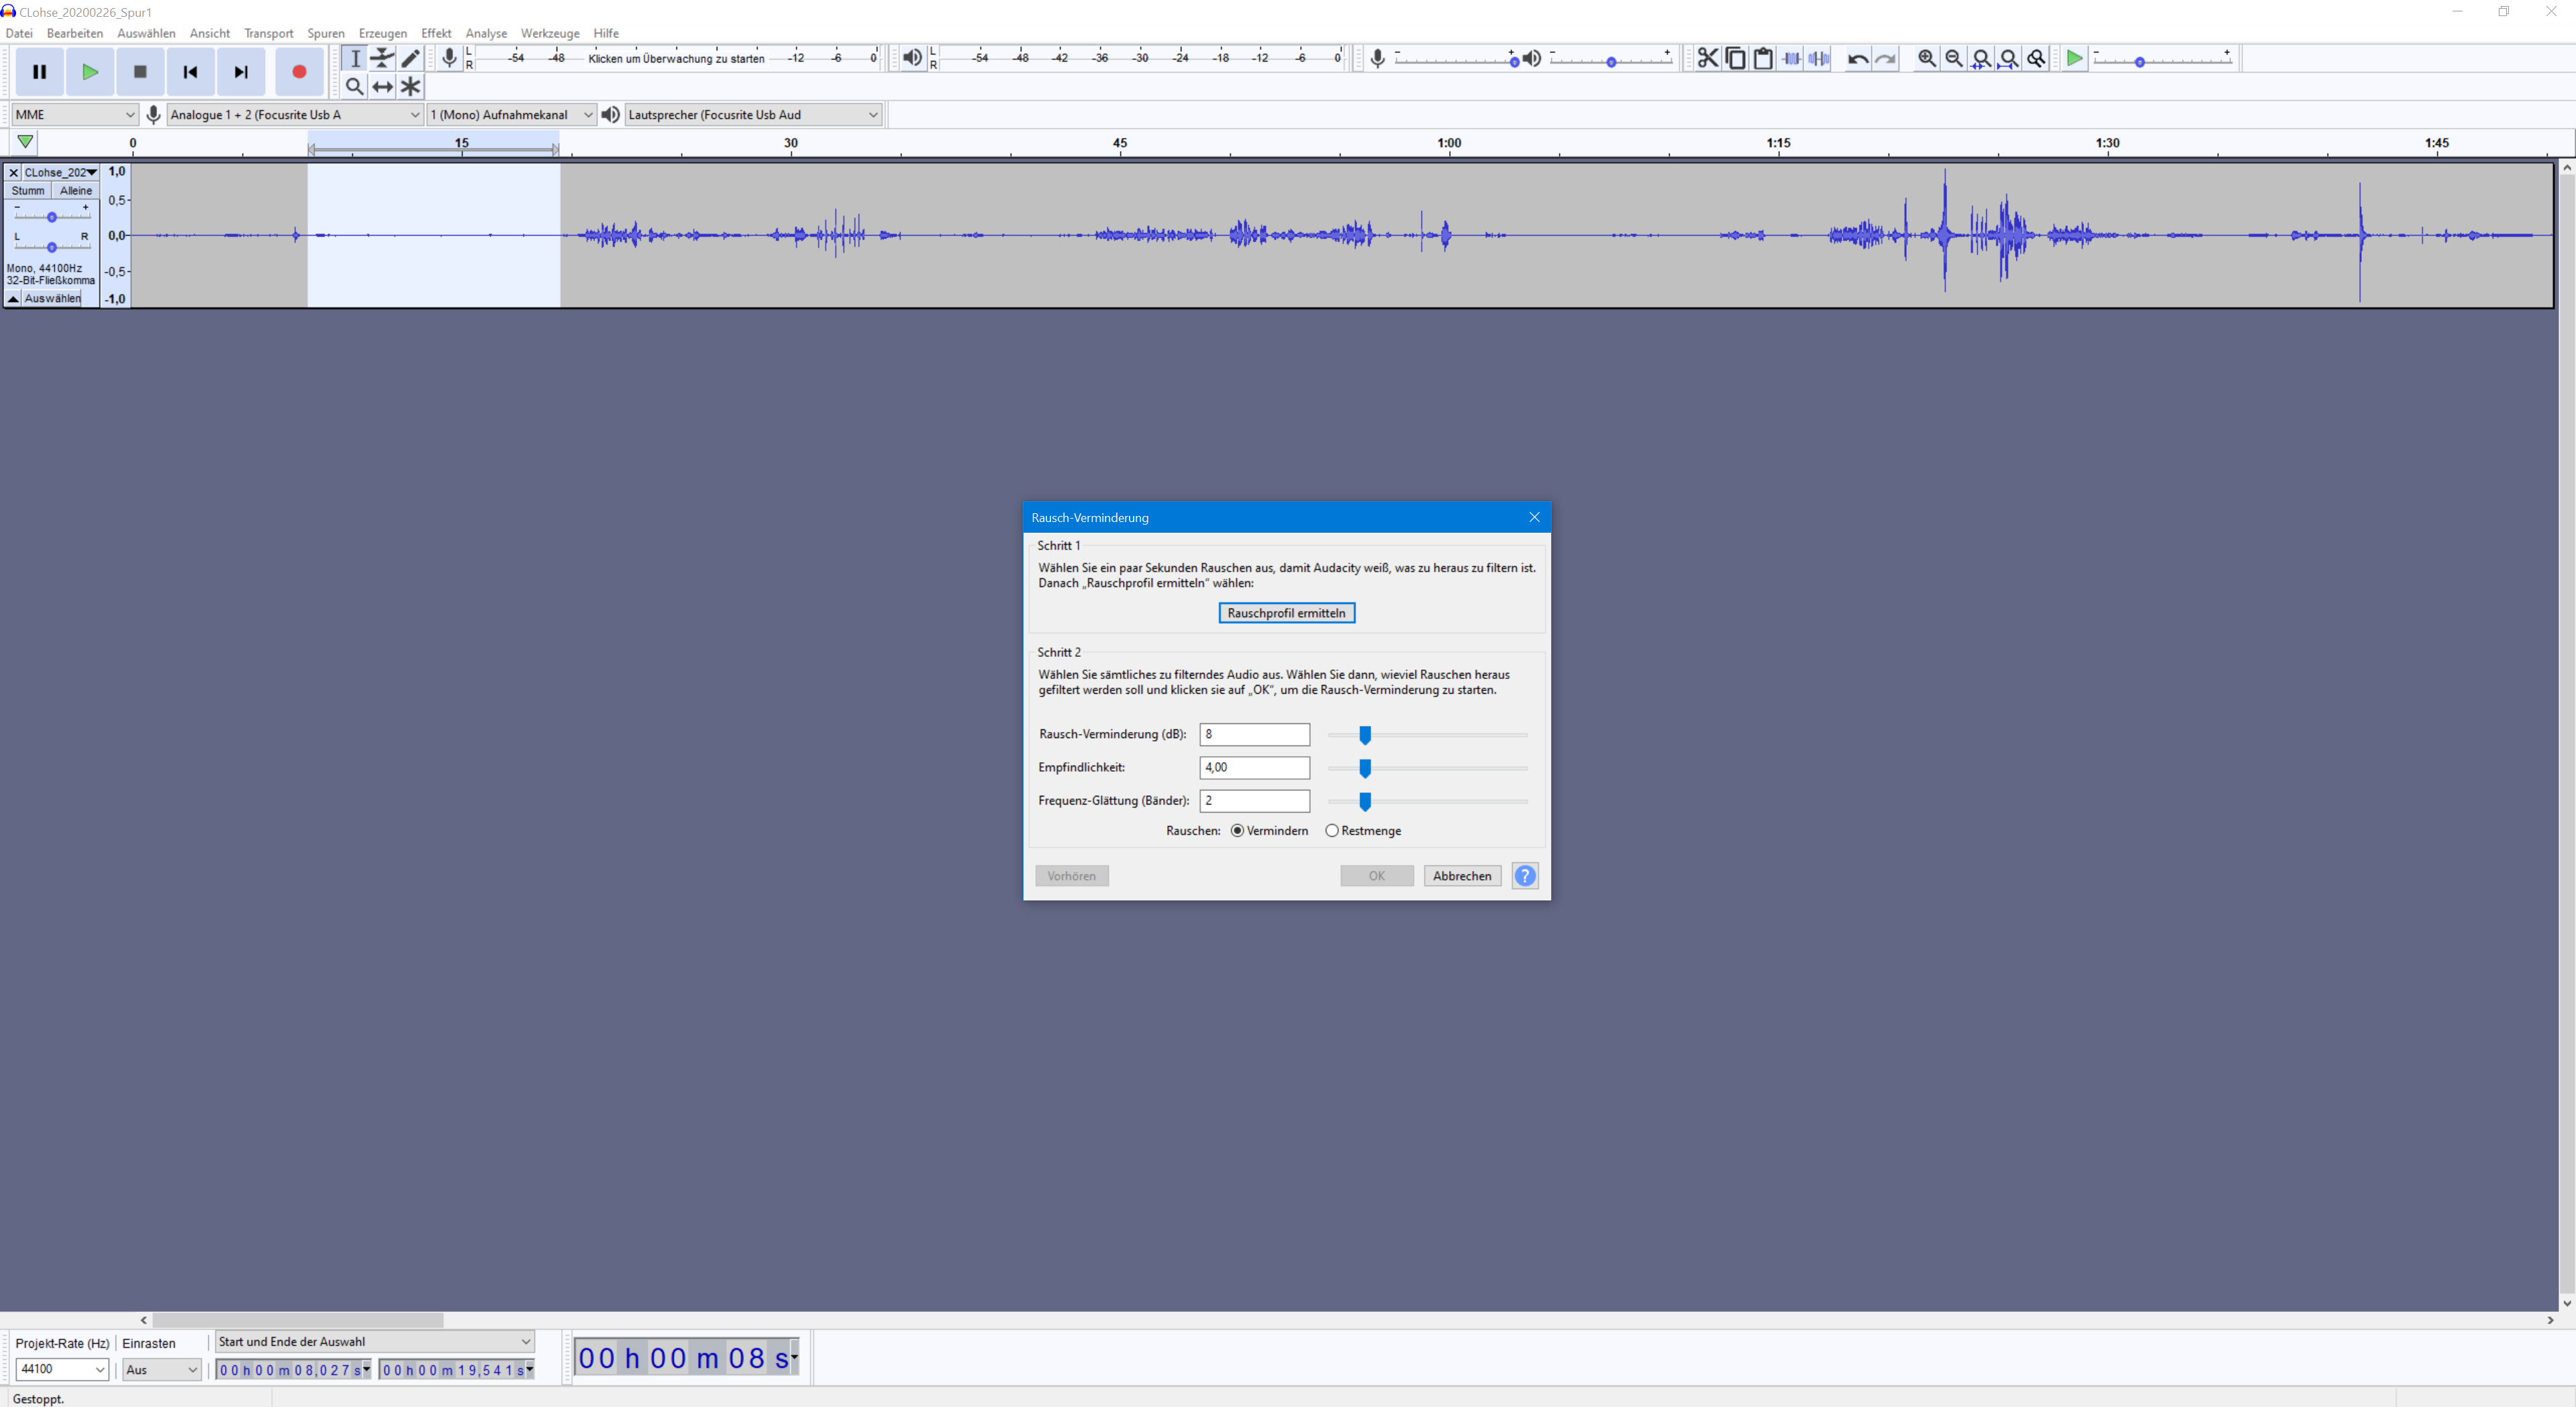 For this we need a quiet area where only the noise can be heard. Such an area can often be found at the beginning or end of a recording or during a pause in speech.
Once you have found such an area, select it, then click on Effects, on Noise Reduction and Determine Noise Profile. Then select the area from which you want to filter out the noise, go back to Effects, Noise Reduction and click OK. Depending on what kind of noise it is, you may have to experiment a bit with the settings. It can happen that if you filter too much, the voice sounds very unnatural, e.g. metallic.