Ceylan Türkyilmaz & Christian Stoll 2021
Creation of laying videos as an action-oriented teaching method
 Laying videos are short explanatory videos (films) that help to reduce extensive topics and contexts to the essentials. With the help of inserted image and text elements, important content can be shown visually and explained by the speaker. Laying videos are a very popular format nowadays. Lecture videos are also being used more and more in teaching. Whether basics or special content – Laying videos can be created for different topics. Lecture videos can be created by teachers to convey content, and learners can also create their own lecture videos within a course.
To create a laying video within a course, the following steps should be followed:
- form groups
- inform
- plan/decide
- create video
- Video erstellen
- evaluate result/reflect on process
- present/publish video
Form groups: Each group chooses a topic or issue they want to make a video about.
Inform: Participants research relevant information to solve the problem.
Plan/Decide: The scope of the topic is reduced to its essentials and recorded in a storyboard. Care should be taken to keep the wording as simple and understandable as possible.
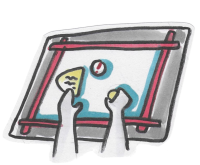
Create material: Now picture elements can be chosen and drawn. Which images should not be missing? Which additional elements help to illustrate emotions or relationships, for example? Note that each scene should have several elements that support the speaker's explanations.
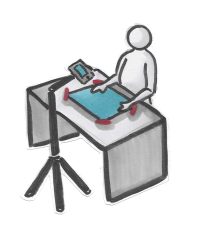
Create video: The next step is to shoot the laying video. The group members take on different roles in the process. There is the narrator(s) who tell the story from the script, i.e., the storyboard, the layperson who puts the elements into the frame, and the cameraman who is responsible for filming and background lighting.
A few quick notes on filming the laying video:
- It should be filmed in landscape format - note a few seconds of forward and backward motion.
- A smartphone with camera function and a tripod or selfie stick are sufficient for filming. The smartphone should be held parallel and firmly to the recording surface.
- The outer frame of the image should be marked, if possible, so that the image elements are not arranged incorrectly and everything is clearly visible.
- If the scenes cannot be recorded one after the other directly in a video, the individual scenes should be marked, for example, with director's flaps or cards before a recording, so that the files can then be sorted and brought together to form a video.
- In addition, to avoid post-production editing, it is advantageous to speak the text from the script directly to the video.
Evaluate result/reflect on process: In the last step, a critical look is recommended: Was the core message that needed to be conveyed explained well in the video? Were the visual and voice elements sufficient (for that)? Did the story have an arc of tension or was it able to evoke emotions? Was the shot well designed and the lighting clear? After answering these questions, subsequent edits such as adding musical elements or optimizing the image can be made using video editing programs. To give the videos a personal touch, individual pre- and post-production elements can be selected.
Video presentation/publication: Presentation of the video within the course or publication on common video platforms.

